Tuesday, June 30, 2015

Creating your first android application using Android Studio Part 1

This lesson shows how to create a new project using Android Studio.

Below screen show the options on starting Android Studio.

Select Start a new Android Studio Project. New screen as shown below will open. Enter all the fields - Application name, project location ( package name is also editable) then Click Next.
Choose the Android version for your target audience. After selecting API versions click Next
Next select the Activity Home screen for your application. Android studio provides in built code sample for various home screen layouts. Please choose the basic one - blank activity for learning purpose for now.


Next give proper name to your activity default one is MainActivity and we will continue with this only and select Finish.

After this Android studio will create all necessary folders and files for your project and open the below window for working on your project.


Lets first understand the project structure before working on project.

An Android project contains everything that defines your Android app, from app source code to build configurations and test code. The SDK tools require that your projects follow a specific structure so it can compile and package your application correctly.  Below screenshot 
.idea
Directory for IntelliJ IDEA settings.
app
Application module directories and files.
build
This directory stories the build output for all project modules.
gradle
Contains the gradler-wrapper files.
.gitignore
Specifies the untracked files that Git should ignore.
build.gradle
Customizable properties for the build system. You can edit this file to specify the default build settings used by the application modules and also set the location of your keystore and key alias so that the build tools can sign your application when building in release mode. This file is integral to the project, so maintain it in a source revision control system.
gradle.properties
Project-wide Gradle settings.
gradlew
Gradle startup script for Unix.
gradlew.bat
Gradle startup script for Windows.
local.properties
Customizable computer-specific properties for the build system, such as the path to the SDK installation. Because the content of the file is specific to the local installation of the SDK, the local.properties should not be maintained in a source revision control system.
.iml
Module file created by the IntelliJ IDEA to store module information.
settings.gradle
Specifies the sub-projects to build.

We will continue in next Part...

Friday, January 27, 2012

How to use ExpandableListView

Working with ExpandableListView is very complex, so to make things simpler I will explain you how to use this ListView in few simple steps. This example will display 3 category of vehicles in a ExpandableList.

Firstly we will create the Layout files for Main Activity, GroupView and ChildView Layout.
MainActivity: main.xml


<?xml version="1.0" encoding="utf-8"?>
<LinearLayout xmlns:android="http://schemas.android.com/apk/res/android"
    android:layout_width="fill_parent"
    android:layout_height="fill_parent"
    android:orientation="vertical" >
    <ExpandableListView
        android:id="@+id/listView"
        android:layout_width="match_parent"
        android:layout_height="fill_parent" >
    </ExpandableListView>
</LinearLayout>

Thursday, December 29, 2011

How to Root Samsung Galaxy SL I9003 on Gingerbread 2.3.6 DDKP1/DDKP2 Firmware

This tutorial will guide you to root your Samsung Galaxy SL GT-I9003 with latest DDKP2 Gingerbread 2.3.6 firmwares. So, before you proceed ensure that you are on the DDKP2 versions. To check visit the path Settings > About Phone > Firmware Version where it will show DDKP1 / DDKP2 2.3.6. Just in case if it shown any other firmware version then this article is not for you.
Disclaimer: We should not be held responsible in any manner just in case if anything wrong happens to your device, which is a very unlikely event if you follow the procedure which is mentioned below.

Rooting Information: Please note that once you root the device the warranty will get void, so keep a note of this. The only way with which you can revoke the root access is that you need to again re apply the firmware update of DDKP1 or DDKP2 so that the warranty will get void.
Many of the Users ask us in the comments section on what is Rooting and what are its advantages.

What is Rooting and its Advantages:
Rooting is a process wherein the system files are provided with the access by the third party applications due to which the customization becomes possible.
Rooting allows you to customize the phone with the help of custom ROMs and also allows you to make use of other apps which require the rooting access.
The only disadvantage is that the warranty gets void, though it can be regained by updating with any of the stock or default firmwares.
So, let’s check out on what are the list of Pre Requisites you need to follow before moving to the procedure.

Sunday, October 30, 2011

Best free android games Part 1


As Android phones have increased in popularity, the number of apps available for the platform has rocketed.
And that means more free Android games. There's a lot of junk out there but, fortunately, there are gems among the junk.
We've worked our way through a whole load of Android games to reveal the ones you should download to your phone.

1. Angry Birds
The amazingly popular iOS game moved to Android , earning over two million downloads during its first weekend of availability.
The Android version is free, unlike the Apple release, with maker Rovio opting to stick a few adverts on it rather than charge an upfront fee. The result is a massive and very challenging physics puzzler that's incredibly polished and professional. For free. It defies all the laws of modern retail.

Angry birds
2. Bebbled
Bebbled is your standard gem-shuffling thing, only presented in a professional style you wouldn't be surprised to see running on something featuring a Nintendo badge with an asking price of £19.99.
You only drop gems on other gems to nuke larger groups of the same colour, but with ever-tightening demands for score combos and scenes that require you to rotate your phone to flip the play field on its head, Bebbled soon morphs into an incredibly complex challenge.
Bebbled
3. Red Stone
There's an awful lot of square-shuffling games on Android and Red Stone is one of the best. And one of the hardest. You start off with a big fat 'King' square that's four times of the normal 'pawn' squares, then set about shuffling things so the fat King can get through to an exit at the top of the screen.
It's hard to accurately describe a puzzle game in the written word, but seriously, it's a good game.
Red stone
4. Newton
Released a few months back in beta form, Newton is a maths/physics challenge that has you lining up shots at a target - but having to contend with the laws of nature, in the form of pushers, pullers, benders (no laughing), mirrors and traps, all deflecting your shot from its target.
The developer is still adding levels to it at the moment, so one day Newtonmight be finished and might cost money. But for now it's free and a great indie creation.
Newton

Monday, June 27, 2011

How to Install Applications On Android Without The Market

 Installing apps on Android is relatively straightforward with the Android Market. You search for an app, select it and click install. However, there are often times when you may want to install a newly released app or an app that is not available in the Android Market. In these cases you will usually have to manually download and install an .apk file. An .apk file behaves in a similar manner to a “.exe” file on Windows, you need to copy it to your device and run it. Here are some ways that you can manually install an application without going through the market.

Sunday, June 12, 2011

Best Android Phones in India


android phones in india Best Android Phones in India [April Edition]
High-end Android smartphones in India:

Samsung Galaxy S II: There is no second-thought about the fact that there is no other smartphone of this caliber currently in Indian market or will be launched in couple of weeks. So, if you have money and you want a seriously powerful Android smartphone – Galaxy S II is your baby. It will be on sale from June 9/10 in all major stores.
MRP:  INR 32,890 | Street Price: INR 30,500 (expected)
LG Optimus 2X: This is the only dual core Android smartphone available in Indian market right now, although Samsung has announced that Galaxy S2 will reach sometime in May, but till then Optimus 2X is your best bet. With company’s confirmation regarding the Gingerbread update for the device, this dual core beauty is a must have if you are looking for a performance giant.

Thursday, May 19, 2011

Android 3.1 is here...


Welcome to Android 3.1!
Android 3.1 is an incremental platform release that refines many of the features introduced in Android 3.0. It builds on the same tablet-optimized UI and features offered in Android 3.0 and adds several new capabilities for users and developers. This document provides an overview of the new features and technologies introduced in Android 3.1. For a more detailed look at new developer APIs, see the API Overview document.

UI refinements

The Android 3.1 platform adds a variety of refinements to make the user interface more intuitive and more efficient to use.

Thursday, April 21, 2011

Android 3.0 Introduction

Welcome to Android 3.0!


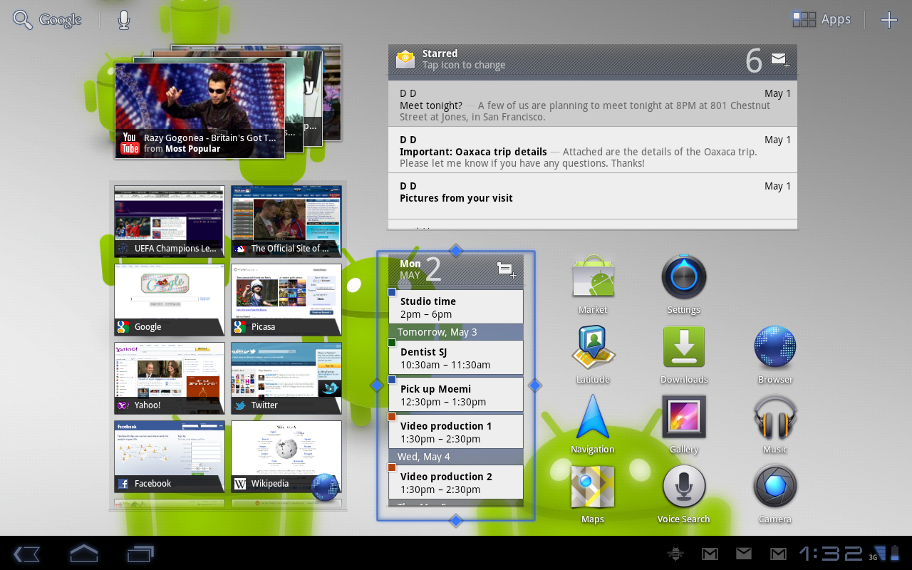
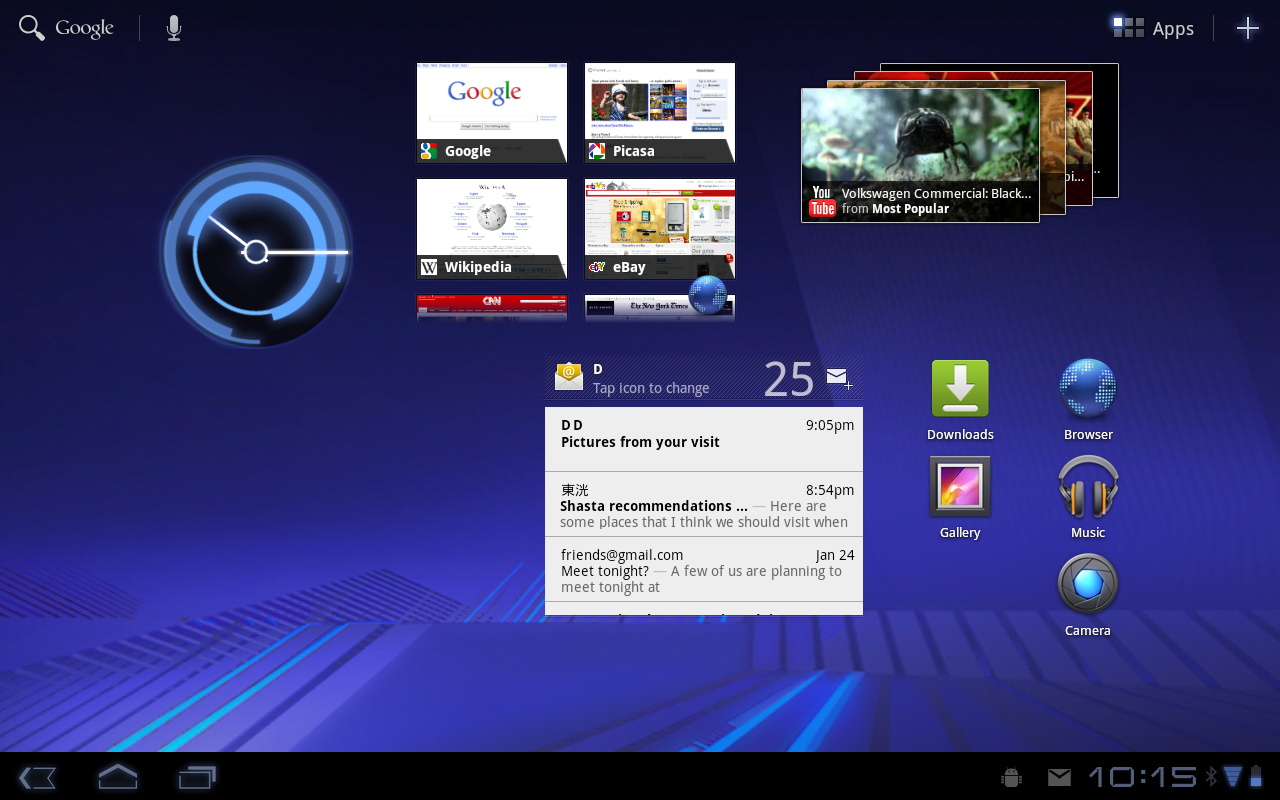
Android 3.0 is a new version of the Android platform that is specifically optimized for devices with larger screen sizes, particularly tablets. It introduces a brand new, truly virtual and “holographic” UI design, as well as an elegant, content-focused interaction model.


New User Features

New UI designed from the ground up for tablets

Android 3.0 builds on the things people love most about Android — refined multitasking, rich notifications, Home screen customization, widgets, and more — and transforms them with a vibrant, 3D experience and deeper interactivity, making them familiar but even better than before.
The new UI brings fresh paradigms for interaction, navigation, and customization and makes them available to all applications — even those built for earlier versions of the platform.
System Bar, for global status and notifications
Across the system and in all applications, users have quick access to notifications, system status, and soft navigation buttons in a System Bar, available at the bottom of the screen.

Upcoming Android Phones...

  •  HTC Sensation 4G launching June 8th 


  • Motorola Droid Bionic

Wednesday, November 3, 2010

Using Statusbar Notification in android

This is an example of using Status Bar Notification in Android. Notifications are using in Android to notify the user of events. The classes Notification and NotificationManager is used create notification. NotificationManager is a system service. We get the instance using getSystemService. The following code snippet creates a default notification:

NotificationManager notificationManager = (NotificationManager)getSystemService
(Context.NOTIFICATION_SERVICE);

int icon = R.drawable.icon;
CharSequence text = "Notification Text";
CharSequence contentTitle = "Notification Title";
CharSequence contentText = "Sample notification text.";
long when = System.currentTimeMillis();

Tuesday, October 26, 2010

How to use Date Picker...

A DatePicker is a widget that allows the user to select a month, day and year.


Create a new Android Application, AndroidDatePicker.

Modify the layout, main.xml, to add a button to start the DatePicker.


<?xml version="1.0" encoding="utf-8"?>
<LinearLayout xmlns:android="http://schemas.android.com/apk/res/android"
    android:orientation="vertical"
    android:layout_width="fill_parent"
    android:layout_height="fill_parent"
    >
<TextView  
    android:layout_width="fill_parent" 
    android:layout_height="wrap_content" 
    android:text="@string/hello"
    />
<Button

How to use Time Picker...

A TimePicker is a widget that allows the user to select the time by hour, minute and AM or PM.


Further extends from the previouse exercise of DatePicker.

Modify main to have one more button to start TimePicker.


<?xml version="1.0" encoding="utf-8"?>
<LinearLayout xmlns:android="http://schemas.android.com/apk/res/android"
    android:orientation="vertical"
    android:layout_width="fill_parent"
    android:layout_height="fill_parent"
    >
<TextView  
    android:layout_width="fill_parent" 
    android:layout_height="wrap_content" 
    android:text="@string/hello"
    />
<Button
    android:id="@+id/datepickerbutton"
    android:layout_width="fill_parent" 
    android:layout_height="wrap_content" 
    android:text="DatePicker"
 />
<Button
    android:id="@+id/timepickerbutton"
    android:layout_width="fill_parent" 
    android:layout_height="wrap_content" 
    android:text="TimePicker"
 />
</LinearLayout>


Go Public with Your Android Application: Signing and Deployment (Part 3)

Generating Your Own Key
As mentioned, if you wish to publish your application to other users, you need to sign your application using your own personal certificate. You can generate your own certificate by using the keytool.exe tool (this also comes with your JDK). To generate your own certificate, issue the following command:

keytool –genkey –v –keystore learn2develop.keystore –alias learn2develop –keyalg RSA –validity 10000


The above command generates a certificate named learn2develop.keystore with the key alias learn2develop, generated using the RSA algorithm, and with a validity of 10,000 days (this is the minimum recommended). You will be prompted for some information (see Figure 7). In particular, you need to supply a password for the keystore and a password for the private key. If you are publishing your application for the Android Market, your keystore must have a validity period ending after 22 October 2033.Secure and protect these two passwords so that only people who are authorized to sign your applications know about them.


Once the learn2develop.keystore file is generated, you can now sign your application with it .
Deploying .apk Files
Once your Android application is signed, you can deploy them to emulators and devices using the adb.exe tool (located in the tools folder of the Android SDK).


For illustration, copy the MyKillerApp.apk created (and signed) in the previous section to the android-sdk-windows-1.0_r1\tools folder. To install the application to an emulator (assuming the emulator is currently up and running), issue the following command:

Go Public with Your Android Application: Signing and Deployment (Part 2)

All Android Applications Must Be Digitally Signed
All Android applications must be signed before they are allowed to be deployed onto a device (or emulator). Unlike other mobile platforms, you need not purchase digital certificates from a certificate authority (CA). Instead, you can generate your own personal certificate and use it to sign your Android applications.


When you use Eclipse to develop your Android application and then press F11 to deploy it to an emulator, Eclipse automatically signs it for you. To verify this, first go to WindowsPreferences in Eclipse, then expand the Android item, and select Build (see Figure ). Eclipse uses a default debug keystore (debug.keystore) to sign your application.

Monday, October 25, 2010

Go Public with Your Android Application: Signing and Deployment (Part 1)

So far, you've been learning about the interesting things you can do with Android. However, if you want your application to see the light of day and run on other users' devices, you need a way to distribute your application and deploy them onto your target devices. This article will show you how to prepare your Android applications for deployment and get them onto your customers' devices.


Creating the Sample Application
A simple Android application will illustrate deployment on an Android device. So, using Eclipse, create a new Android project.

Versioning
Beginning with version 1.0 of the Android SDK, the AndroidManifesl.xml file of every Android applications include the android:versionCode and android:versionName attributes:


<manifest xmlns:android="http://schemas.android.com/apk/res/android"
      package="com.android.myapp"
      android:versionCode="1"
      android:versionName="1.0.0">
    <application android:icon="@drawable/icon" 
        android:label="@string/app_name">
        <activity android:name=".Main"
                  android:name ="@string/app_name">
            <intent-filter>
                <action android:name="android.intent.action.MAIN" />
                <category android:name="android.intent.category.LAUNCHER" />
            </intent-filter>
        </activity>
    </application>
</manifest>
The android:versionCode attribute represents the version number of your application. For every revision you make to the application, increment this value by 1 so that you can programmatically differentiate it from its previous version. This value is never used by the Android system, but it's useful as a way to obtain the version number of an application. The android:versionName attribute contains versioning information that is visible to the users. It should contain values in the following format: <major>.<minor>.<point>.
If you are planning to publish your application on the Android Market, the AndroidManifest.xml file must have the following attributes:
  • android:versionCode
  • android:versionName
  • android:name
  • android:name
In addition, if your application needs a minimum version of the SDK, you can specify it in the AndroidManifest.xml file using the element, like this:


<manifest xmlns:android="http://schemas.android.com/apk/res/android"
      package="net.learn2develop.MyKillerApp"
      android:versionCode="1"
      android:versionName="1.0.0">

    <uses-sdk android:minSdkVersion="5" />

    <application android:icon="@drawable/icon" 
        android:label="@string/app_name">
        <activity android:name=".MyKillerApp"
                  android:label="@string/app_name">
            <intent-filter>
                <action android:name="android.intent.action.MAIN" />
                <category android:name="android.intent.category.LAUNCHER" />
            </intent-filter>
        </activity>
    </application>
</manifest>
As the current version of the SDK is 1.0, there is no necessity for you to specify the minimum version of the SDK required. 


Your Ad Here

Friday, October 22, 2010

How to create sd card and save files in it and use them

As you can imagine a popular way to load music onto a cell phone will be via removable storage, such as an SD card. In part 1 of our media player tutorial we will build a simple media player that will allow the user to select a song from the SD card and play it.
Click here if you would like to download the source for this tutorial.
Note: there is a known issue with the Emulator where the mixer will cut in and out on some systems resulting in very choppy audio, hopefully this will be addressed in the next SDK release.
Layouts
This project only consists of one Activity, a ListActivity. So, for a ListActivity we need a ListView for the actual list, and another view that will be used for each item in the list. You can get fancy, but for this example we will just use a TextView to display the name of each file.
First, here is our ListView (songlist.xml):
  1. <?xml version="1.0" encoding="UTF-8"?>
  2. <LinearLayout xmlns:android="http://schemas.android.com/apk/res/android"
  3.         android:orientation="vertical"
  4.         android:layout_width="fill_parent"
  5.         android:layout_height="fill_parent">
  6.  
  7.     <ListView id="@id/android:list"
  8.               android:layout_width="fill_parent"
  9.               android:layout_height="fill_parent"
  10.               android:layout_weight="1"
  11.               android:drawSelectorOnTop="false"/>
  12.  
  13.     <TextView id="@id/android:empty"
  14.               android:layout_width="fill_parent"
  15.               android:layout_height="fill_parent"
  16.               android:text="No songs found on SD Card."/>
  17. </LinearLayout>
Very standard ListView. The TextView entry will display when there are no items in the ListView because it's using the built-in id of "@id/android:empty".
And for each file here is the TextView to be used (song_item.xml):
  1. <?xml version="1.0" encoding="utf-8"?>
  2. <TextView id="@+id/text1"xmlns:android="http://schemas.android.com/apk/res/android"
  3.     android:layout_width="wrap_content"
  4.     android:layout_height="wrap_content"/>
Again, very basic, shouldn't be anything you haven't seen before.
You may be thinking, why does the screenshot above show a black ListView, when nothing in these layouts mentions color? Well, that is determined by the "theme" in the AndroidManifest.xml. In the "application" element you can define the theme by adding "android:theme="@android:style/Theme.Dark"".
The ListActivity
We now must work on our ListActivity which we will call MusicDroid. Here is the declaration of this class and it's onCreate() function:
  1. public class MusicDroid extends ListActivity {
  2.  
  3.         private static final String MEDIA_PATH = new String("/sdcard/");
  4.         private List<String> songs = new ArrayList<String>();
  5.         private MediaPlayer mp = new MediaPlayer();
  6.         private int currentPosition = 0;
  7.  
  8.         @Override
  9.         public void onCreate(Bundle icicle) {
  10.                 super.onCreate(icicle);
  11.                 setContentView(R.layout.songlist);
  12.                 updateSongList();
  13.         }
First we set up some private member variables to be used by this Activity. The first one is MEDIA_PATH, and we set it to "/sdcard" because that is the location of the SD card. Next comes a List of Strings that will hold the filename for each song on the list. And of course we need a MediaPlayer object, which we call mp. The final one up there is currentPosition, which we will use to store the index of the song currently playing.
The onCreate() function is pretty basic, we set our view to be the songlist view that we created above and call the function updateSongList(), here is that function:
  1. public void updateSongList() {
  2.         File home = new File(MEDIA_PATH);
  3.         if (home.listFiles(new Mp3Filter()).length > 0) {
  4.                 for (File file : home.listFiles(new Mp3Filter())) {
  5.                         songs.add(file.getName());
  6.                 }
  7.  
  8.                 ArrayAdapter<String> songList = newArrayAdapter<String>(this,
  9.                                 R.layout.song_item, songs);
  10.                 setListAdapter(songList);
  11.         }
  12. }
Here we create a File Object called "home" which points to "/sdcard". We loop through the files returned by home.ListFiles(), adding each file to our List object "songs". Once we have this list filled we create an ArrayAdapter passing in the songs list and then set it to be our ListActivity's ListAdapter on line 47. This will populate our ListView.
You may have noticed the object above called "Mp3Filter". This is an object that implements FilenameFilter. This object is used to filter out what files should be returned, this is done by implementing the accept(File, String) function. Here is the object that we can use to filter so that listFiles() only returns MP3 files:
  1. class Mp3Filter implements FilenameFilter {
  2.         public boolean accept(File dir, String name) {
  3.                 return (name.endsWith(".mp3"));
  4.         }
  5. }
Now we should be able to build a list of all the MP3 files in /sdcard. So now we just need to be able to select a song and play it. Fist things first, let's override onListItemClick() so we will be notified when a song is clicked on:
  1. @Override
  2. protected void onListItemClick(ListView l, View v, int position, long id) {
  3.         currentPosition = position;
  4.         playSong(MEDIA_PATH + songs.get(position));
  5. }
Pretty basic function here. We set currentPosition to hold the index of the position that was clicked on and then pass in the path of the song to playSong(String), so lets take a look at what's happening in playSong(String):
  1. private void playSong(String songPath) {
  2.         try {
  3.  
  4.                 mp.reset();
  5.                 mp.setDataSource(songPath);
  6.                 mp.prepare();
  7.                 mp.start();
  8.  
  9.                 // Setup listener so next song starts automatically
  10.                 mp.setOnCompletionListener(new OnCompletionListener() {
  11.  
  12.                         public void onCompletion(MediaPlayer arg0) {
  13.                                 nextSong();
  14.                         }
  15.  
  16.                 });
  17.  
  18.         } catch (IOException e) {
  19.                 Log.v(getString(R.string.app_name), e.getMessage());
  20.         }
  21. }
The MediaPlayer object makes things really easy for us here. First we call mp.reset(), which will reset the MediaPlayer to its normal state. This is required if you were playing a song and want to change the data source. The reset() function will also stop whatever is playing, so if a song is playing and then you select another it will stop that one before starting the next song.
We then pass in the path to the song to mp.setDataSource(String) and call prepare() and start(). At this point the MediaPlayer will start playing your song.
Next job is to setup an OnCompletionListener starting on line 66. The function onCompletion(MediaPlayer) will be called when the song is over. All we do there is call the function nextSong() from our Activity. Here is nextSong():
  1. private void nextSong() {
  2.         if (++currentPosition >= songs.size()) {
  3.                 // Last song, just reset currentPosition
  4.                 currentPosition = 0;
  5.         } else {
  6.                 // Play next song
  7.                 playSong(MEDIA_PATH + songs.get(currentPosition));
  8.         }
  9. }
Here we check to make sure this isn't the last song on the list, if it is we won't do anything, if not we'll play the next song using the playSong(String) function.
So that's it for the code, on the next page we'll figure out how to get this thing running...
Emulator Command Line Options
There are 2 command line options that must be set for this project to work. One to mount an SD card so that you can access it at "/sdcard" and another to enable audio.
To enable the SD card first you need to create an sd card image, to do this you need to open a command prompt in your SDK/tools folder and type the following command:
mksdcard <size><file>
Where <size> is the size of the SD card in MB, and this must be reasonably large as a small SD card image actually crashes the emulator. And <file> is the path to the file to create. This is the command that I used:
mksdcard 128M c:\temp\sd.img
Now your SD card image is setup, so once you have your project setup you will need to supply the 2 command line arguments. So, in Eclipse go to "Run -> Open Run Dialog". Now you may need to create a new configuration if there is not one there for your application, you can do that by double clicking on "Android Application" and supplying the Name, Project, and starting Activity on the "Android" tab. On the "Emulator" tab you need to supply 2 arguments, "-sdcard <file>" and "-useaudio".
It should look something like this:

So now that this is all setup we should be ready to run this thing right? Doh, here's what we see:

We need to add songs to the SD card for this thing to work. This is pretty easy, just open a command prompt in the SDK/tools folder once again and use the "adb push <file> <destination>" command. For example:
adb push "c:\music\02 Paranoid Android.mp3" /sdcard
And after you push a song or many songs out there you'll be able to start using this very primitive music player.
What do you have to look forward to in the next installments?
  • Creating a service for the MediaPlayer
  • Adding animated controls
  • ID3 Tag Support
So, be sure to check back!


Your Ad Here